Blog by Darren “Pancho” Riley
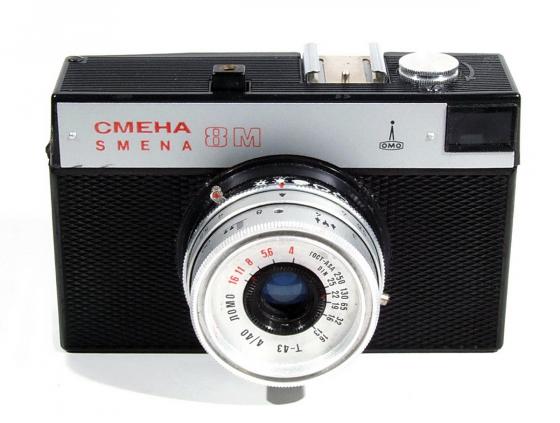
The Lomo Smena 8M. It’s fun. It’s not very practical, has some rather dodgy design features and is easily broken. But it’s also quirky-looking and has a surprisingly decent lens. It’s also pretty cheap if you spend enough time looking around on e-bay and the like.
Dating from the Seventies, it was marketed as an entry-level 35mm camera for students. I’m not sure of the logic behind this, seeing as Western SLR’s with auto-metering were already popular in the early Seventies but I guess this completely manual camera was a good learning aid when it came to getting familiar with shutter speeds and apertures.
Mine is a Smena 8M(C) which was the third version of the camera, manufactured in the Eighties. It’s made of black plastic with a silver-coloured plate on the front (the top of mine is coming off due to a missing screw but this doesn’t affect the operation at all). The lens is a coated glass lens and gives a surprisingly good image. The shutter is manual, which means it has to be cocked before taking a shot. It’s advisable to take the shot with your middle finger as leaving it hanging over the front of the camera often means your finger getting in the way of the shutter lever.
Speeds go from 1/15 to 1/250 second and Bulb mode. I find the relatively slow speed of the shutter makes using any film faster than 200 iso difficult. I once took the camera out with some 400 iso film on a cloudy day. Half an hour later the sun had come out and I was in a sunny 16 situation, which meant I needed a shutter speed of 1/500s. I managed to carry on but I’d advise 100-200 iso film to get the best out of this camera. The aperture is set by setting the small dial on the front of the lens (ranges from f4 to f16). The focus is manual, from 1m to 8m and infinity, with the most precise focus control between 1m and 2.5m. A nice little feature of this camera is the shutter speed legend on the side of the lens.

If you don’t want to learn about the relationship between shutter speeds and aperture you just need to set the aperture corresponding to your film speed (this was detailed in the camera’s manual). Then you just need to look at the weather symbols on the shutter speed selector, from very sunny all the way down to raining. I like this and by using it constantly you will eventually learn about the aperture/shutter speed relationship. It also features a cold-shoe with a PC socket on the side of the lens, so a flash can be synced with it should you need to.
Sadly, the viewfinder is almost pointless. It’s right over at the left of the camera as you hold it, completely offset from the lens and is just a tiny plastic window. If you insist on using the viewfinder, frame your shot then move the center of the camera to your eye to ensure that the lens is capturing what you saw. The frame counter is a small disc built into the body of the camera and is moved by the film passing over a cog in the camera. Bizarrely, you can move the counter around whenever you want to just by pushing it with your finger, which can easily happen accidentally. For this reason, I think it’s best to keep track of the frames in your head.
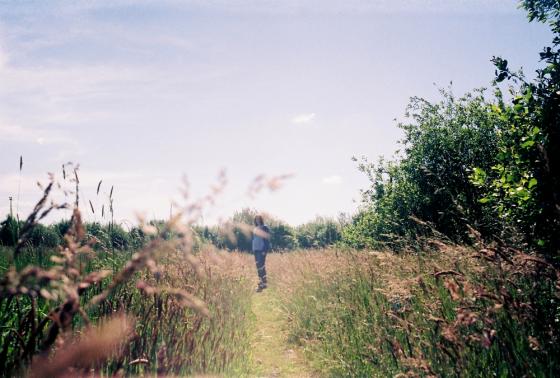
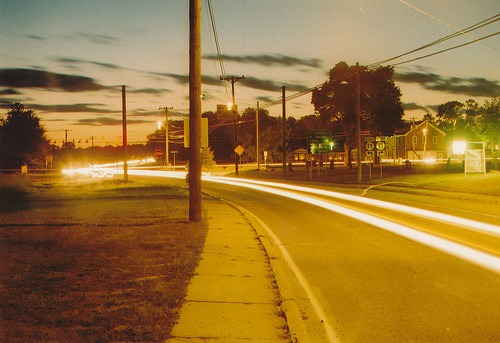
Despite some minor flaws, I really enjoy using it. I like the old-school looks, playing with the aperture and shutter speed settings and the picture quality is pretty good (dare I say better than more expensive modern ‘toy’ cameras’). It’s good with black and white but I think you’ll get the most out of this camera when using colour film. So, fellow FPP fans, why not give one a try?
Yours, Comrade Pancho!
Darren ‘Pancho’ Riley is a relative newcomer to film photography. Prior to buying his first film camera in May 2010, he only ever shot holiday snaps on a cheap digital camera. His discovery of film awakened a real love for photograpy. He uses many different cameras but his favourite’s are the Holga 120GN and the Lomography Sprocket Rocket.
Darren lives in Bolton in the North West of England with his girlfriend Becky, and is the first official UK “Deputy” for The Film Photography Podcast!