Redscale: A Different Way to See the World
Guest Blog by Lance King
Historically, most photographers have labored to make color photographs that reflect actual colors in nature. Film manufacturers produced a wide variety of emulsions intended for specific applications, such as portraiture or landscape work. But since the dawn of digital cameras, and all the social media that followed, many shooters today deliberately manipulate colors to make their photos look faded, heavily saturated, retro, bleached, scratched up and so forth, digitally transforming photos to produce a desired look. But did you know that there are some really fun options for mixing it up old school on film?
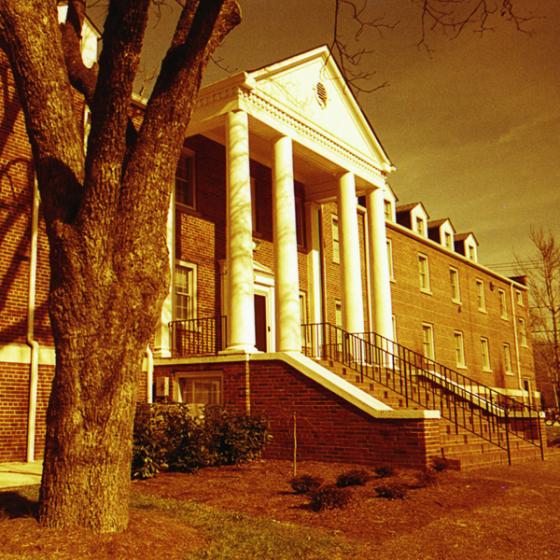
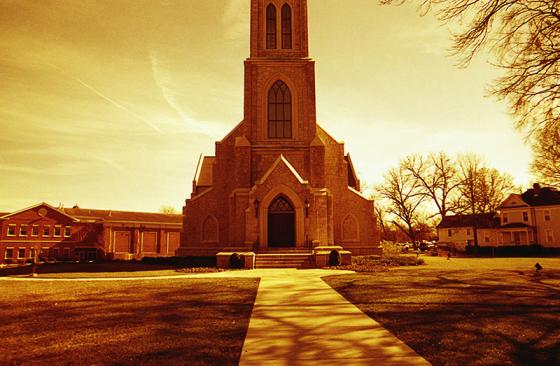
A popular technique that re-purposes ordinary color film is known as redscale. As it happens, February has been designated Redscale Month by the #BelieveInFilm community! As the name suggests, photographs made as redscale images exhibit a red cast which can vary in intensity according to film type, lighting conditions and other factors. What turns ordinary color print film into redscale is simply the act of shooting on the “wrong” side of the negative. Instead of loading the film so that the shiny (non-emulsion) side of the film faces the back of the camera, you load the film so that the shiny side faces the front where it gets exposed when you press the shutter button. This method makes light pass through the film base before it reaches the emulsion, thereby altering the normal color rendition.
There are two ways you can achieve this effect:
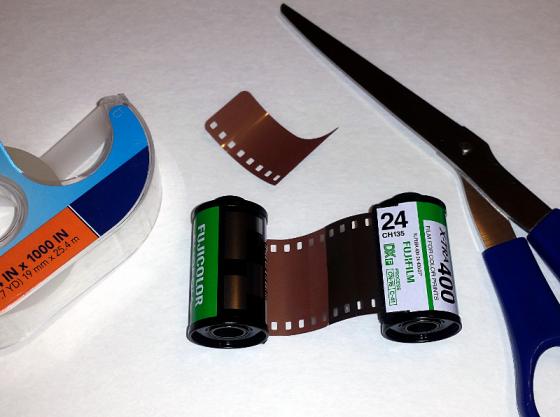
DIY redscale. The two ends have been carefully taped together, after cutting off the leader. The left roll is full and is about to be wound into the roll on the right. Winding between rolls requires total darkness.
The DIY method is to load the film into a second film cartridge (or on a reel, if you’re shooting with medium format film) in reverse. You’ll need a dark room or film changing bag, a bit of tape, scissors and a 2nd film cassette. You can watch a video that illustrates the process here. It’s not hard to do once you’ve seen the technique demonstrated. And you can use any common “C-41” color film found at your local drugstore, such as Kodak Gold or Fuji Superia.
If you find the notion of reverse rolling your own redscale film intimidating, or you just don’t want to be bothered with the effort, then you can buy pre-packaged redscale film. You’ll pay just a few dollars extra for the convenience. Pay attention to the suggested ISO for whatever type of film you buy. If you’re reversing your own film, try shooting it three stops less than the rated speed; for example, if you’re shooting Fuji Superia X-TRA 400 film, set your camera to ISO 50 to account for the light lost when loading the film backwards in your camera.
Redscale isn’t a technique you’ll want to use all the time, but it is a fun way to get unusual results when you want a different look.
About Lance King – A professional photographer based in the Knoxville area, with specialties in portraits, head shots, and food photography. My work entails the use of digital and film mediums depending on the demands of the subject and my artistic vision for the images. I also do fine art landscape work in my spare time, occasionally selling prints. http://www.lancekingphotography.com/
Additional reading: SHOOT RED SCALE – Blog by Mark Killmer – http://filmphotographyproject.com/content/features/2014/11/shooting-red-scale-film
Red Scale film is available at our very own FPP On-Line Store in 35mm, 120 or 620!