Here on the FPP website, there has slowly been a series of darkroom topics emerging, such as setting up your own darkroom, developing your own film, and even making your own silver gelatin prints. But what if I told you that it was all just the beginning?
That’s right! The world of traditional and alternative photographic processes is vast. Each one has its own unique signature, a feel that is hardly replicated outside of the darkroom. Even in 2012, many film photographers, as well as digital, are migrating back to these processes to help add a certain look to their creative vision.
When I first read the proposal for this article by Mr. Jeff Leaming, I was floored with both Jeff’s knowledge of this topic, and his sheer commitment to an all-analog process. If you’re like me and are completely foreign to lith printing, this is one of the best all-in-one guides to getting started with this very cool alternative process. A hint of caution though, if you start printing with lith, you just might fall in love with the grain! – Mat Marrash
What is a Lith Print? / Guest blog by Jeff Leaming
A lith print is a silver gelatin print that has been over exposed and partially developed in highly diluted lith film developer. The prints often achieve tones that are impossible to achieve without toning and sometimes are only possible using the lith printing process.
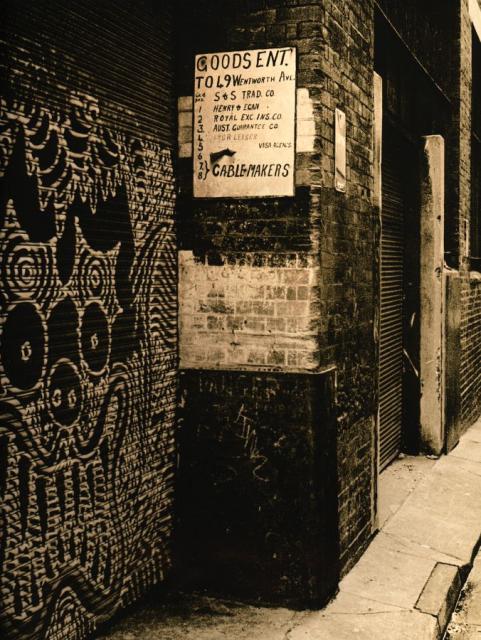
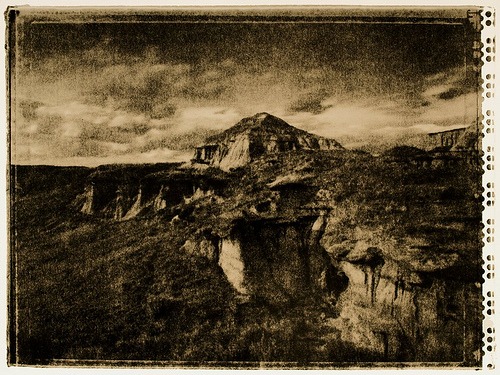
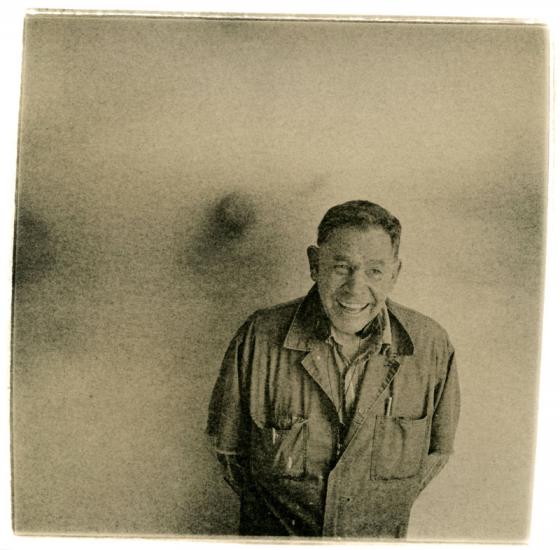
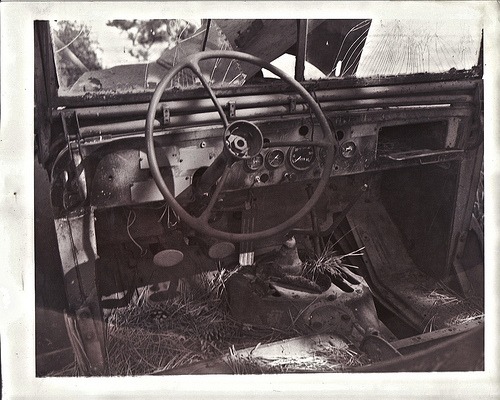
Lith prints may display delicate, soft, warm toned highlights and mid tones and cool, gritty and harsh shadows. Prints can be made to be completely cool toned, gritty and harsh or they can be left with soft delicate warm tones throughout.
The end result depends on the materials used and perhaps, the printer’s mood.
How lith works
The lith effect is caused by a phenomenon called infectious development. Without getting into too much chemistry, infectious development is simply the un-regulated development of silver in the image by the developing agent. This is achieved through the addition of formaldehyde to the developer to lock up excess sulphite, which would normally regulate the rate of development.
For infectious development to provide us with image of normal-ish contrast the developer is highly diluted and the paper is heavily over exposed. Typically the shadows will start to develop slowly but quite quickly this development becomes exponential. The print is removed when the shadows have reached the required density and quickly stoped, as the print will quickly turn black due to the massive over exposure.
What do I need to try lith printing
In order to catch the lith printing bug you will need:
*Negatives
* A functional darkroom
* “Lith-able” paper
Not all papers are good for this process; this is particularly true for emulsions that contain developing agents. These incorporated developing agents will develop the image before the lith infectious development can take place. To test if your favorite paper has incorporated developing agents, place a drop of lith solution b on an unexposed strip of paper in room light. If the paper exposed to the solution starts to turn black then the paper has incorporated developing agents and is no good for lith printing.
One of the best manufacturers of lithable papers is Foma. Most of the papers made by Foma will lith to some degree; Fomatone MG is one of the most popular. Fomatone is available in both FB and RC and a variety of paper surfaces. It makes a great paper to learn the lith process and is very versatile. Whilst I can’t prove it, I believe that Fomatone is also being sold “off-label” as Oriental FBVC-II new warm tone. Ilford, Fotokemika, Slavich, Adox also make papers that lith and even some house brand papers like Arista. EDU ultra will lith.
* Lith Developer
There are a number of lith developers that work well for lith printing, these include Fotospeed LD20, Rollei Creative Lith, Moersch SE5, Moersch Easy Lith, Arista liquid and Arista powder (both from Freestyle Photographic Supply).
*Standard darkroom chemicals
A small 5×7 tray or beaker of standard paper developer is useful for making your initial test strips. You will also need stop, fix and hypo-clear.
You will find things easier if you have:
*A darkroom torch
This is almost a must have in any darkroom. It is simply a LED torch with a red or orange LED, so its “safe” to use in the darkroom. These are easy to make yourself or can be purchased
*F-stop enlarger timer
Another almost must have in any darkroom. Once you use one you won’t be able to understand how you worked without one.(F-Stop printing is probably best left for its own blog post)
Step by Step guide to making your first lith print
*Prepare your chemistry.
Mix your lith developer up at 1:1:18-1:1:30, this is at least 3 time more dilute that the usual mix for processing graphic arts films. I like 1:1:23 which is 1 part of Solution A, 1 part solution B and 23 parts water. Stop bath and fix as per usual. As you will be probably using fibre based papers you will need a some Hypo clear.
*Remove any VC filtration
Contrast is controlled by exposure (See the two golden rules below). This filtration will only slow you down by making your paper exposures much longer than they need to be.
*Calculate the paper exposure
Find the base exposure by making a test strip, use your standard developer (I use Dektol) for this. Look for the time where the highlights and mid-tones seem about right. Increase this time by 2 stops to get your lith exposure. For example a test strip time of 15 seconds becomes a lith exposure of 60 seconds.
*Expose the paper
*Develop the print
Immerse the entire sheet of paper into the developer and agitate very softly. Your development will range from 3 to 30 mins, 5-10 mins are my usual times. The shadows will first come up faintly and after a period of time will start to develop rapidly. This is the infectious development mentioned earlier. Once shadows have reached the optimal level you have reached the “snatch point”. At this stage, “snatch” the print, quickly remove the print from the developer and move quickly into the stop bath.
*Stop, fix, and Wash
Finish as would usually treat your other prints. The print will lighten somewhat when it hits the fix and over fixing should be avoided as it can easily destroy delicate highlight tones.
The two golden rules of lith printing
Tim Rudman, arguably the authority on Lith printing, has boiled the practice of Lith printing down into two golden rules.
Golden Rule One:
Image color and contrast are related to grain size in the paper emulsion, which in turn is related to its stage of development. Small grains of early development are soft and warm. Large grains of late development are hard and cold. The progress of development is affected of course by dilution, temperature, time and freshness of the developer.
Golden Rule Two:
Highlights are controlled by exposure.
Shadows are controlled by development (‘snatch point’).
References and recommended reading
The world of Lith Printing. Tim Rudman. (Out of print, hard to find)
The Master Photographer’s Lith Printing Course: A Definitive Guide to Creative Lith Printing.
Tim Rudman. (Still available)
Lith Printing Materials Update, Nov 2011. Downloaded from www.timrudman.com, after you sign up to Tim’s mailing list.
Jeff Leaming is an analog photographer. He is motivated purely by passion for the traditional medium and processes. He continues to photograph on film, processes his own film, and makes his prints in the traditional way, in a darkroom. Jeff now shoots B&W films exclusively. He prints both traditional silver gelatin and lith prints. He also has a bad case of G.A.S You can view his flickr stream http://www.flickr.com/photos/trotkiller/ and you can contact him via his website www.jeffleaming.com