When you take a picture on black and white film, light is permeating layers of sensitized silver, physically altering the structure of the silver and thereby capturing the image. Through development, the light-struck silver develops as black for highlight values and becomes increasingly more transparent for shadow values. To get a positive image, one must either scan the film and reverse the image digitally, or do the traditional thing and make a gelatin silver print. Much like the B&W film, a gelatin silver print is an image suspended in a layer of silver gelatin, but on a paper substrate. Enough about the science behind it, have you seen one of these prints?! They have rich, deep blacks, crisp, clean whites, and can vary the number of grey scales from a long, low-contrast image to an almost pure b&w high-contrast image. Couple this with a 25 year minimum print stability and you’ve got yourself one fine print.

8×10 gelatin silver print from the 2011 FPP Print Exchange
So you’ve got a negative that you’d like to print, but what do you need to do now? There are a variety of ways to get started, but let’s go over the basics on how to get to a silver gelatin print.
- Light source – you need a source of light to expose through the negative and onto your paper.
- Contact – you need something the hold the negative flat, either to enlarge or to hold flat directly onto your photo paper.
- Paper – this is receiving the image projected from the light source and through the negative.
- Chemistry – paper developer, stop bath, fixer, water, and some trays will get the job done.
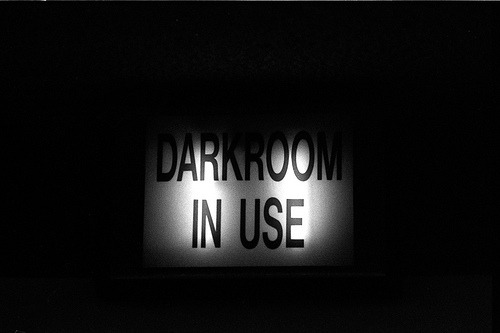
- Darkroom – some painters tape, a spare bedsheet, and an 11 watt safe bulb (http://www.freestylephoto.biz/12622-Halco-11-Watt-S14-Transparent-Red-Bulb) will do.
- Drying rack – some folks use expensive cabinets, but a string clothesline and wooden clothes-hangers do nicely.
If you’re really strapped for cash, you can make your own gelatin silver prints, for < $50! Instead of enlarging, all you need is a light bulb, a clean plate of glass to keep good contact, and some chemistry. Many of Edward Weston’s legendary B&W images were made this very same way! This may not be the most glamorous option for showing off those crisp 35mm images, but it’s a start. If you like what you see in the smaller size, you can always make the jump up to an enlarger.
When enlarging 35mm negatives, a good place to start would be a good used enlarger such as a Beseler 23C (non color head). If you take a look at what they’re going for new, it’s probably a good idea to hit up local estate sales and Craigslist for a used model. If working with medium format all the way up to 4×5” negatives, the next best enlarger would be the classic Beseler 45 series enlargers, or a comparable other branded enlarger. I’ve worked with several other brands, but Beseler enlargers are built like tanks and are widely available on the used market for almost nothing. Now that we’re considering enlarging, our supply list grows a bit more as well:
- Enlarger – to project your negative larger than the physical size of the negative, but make sure it comes with a lens and a light.
- Negative Holder – to hold your negative flat to the projection surface.
- Baseboard – a flat, level surface, typically comes installed on the enlarger.
- Print easel – to hold your photo paper flat with. Dan Domme and myself personally recommend a speed easel. Painters tape is the cheap alternative.
- Grain focuser – to check the sharpness of the grain as you’re focusing your enlarged image, an optional ad-on.

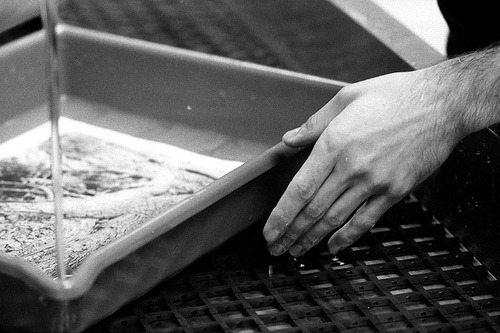
Once you’ve made the proper exposure to your paper, while in your darkroom, place the paper into the tray of developer. Agitate the print by: moving the tray back and forth, shuffling the print in the developer by hand/tongs, or flipping the print over continuously in the developer (no matter which you choose, stay consistent). For resin coated or RC papers, typically one minute is plenty of development time, two minutes if you want to make sure the blacks are at their maximum density. For fiber based papers/FB, two minutes is a good starting point and four minutes is the maximum. After development, immerse your print in stop bath, 10-30 sec. for RC, 20 – 45 sec. for FB. From there, drain and move to the fixer bath. RC prints 1-2 min. and FB prints 4-5 min. Agitate regularly while in the fix, then drain and move the print to a continuously filling/draining water bath. After 2-5 min. your RC print will be ready to hang dry, and 20-30 min. your FB prints will be ready to hang dry. If it hasn’t already become apparent, fiber based papers can be quite a hassle for a beginning printer. I suggest start with RC, and if you like what you see, fiber will only increase this experience. For drying, RC is fine once hung, but FB still needs a little help. Fiber prints have a strong tendency to curl like an old scroll, so try to hang two sheets of FB paper, back-to-back then clip the opposing corners so they make a straight line draining downward. This along with a good squeegee of the print will discourage some curling, but the rest can be taken care of with a couple of days under a heavy stack of books.
Well, that’s pretty much it to making a silver gelatin print. There are a ton of advanced techniques that can be employed in making a print, but following this how to will get you to a black and white image you can really appreciate. I’ll warn you now, though, do too many more prints, and you’ll start to ask yourself why you ever printed any other way!
If you have any questions, feel free to send me an email at:
Or leave a comment below. Here at FPP, we’d LOVE to see some handmade listener images, so get posting those beautiful prints to the FPP Flickr Pool as well.
Happy printing, and long live film!
-Mat M.
Mat Marrash is the co-host of the Film Photography Podcast