Tips, Tricks and Observations of the Lab-Box.
by Leslie Lazenby
Editor’s Note: The LAB BOX (Deluxe FPP Edition including 35mm and 120 Module, D76 Developer and Fixer is now available at the FPP On-Line Store! Follow this link to visit the LAB BOX order page)
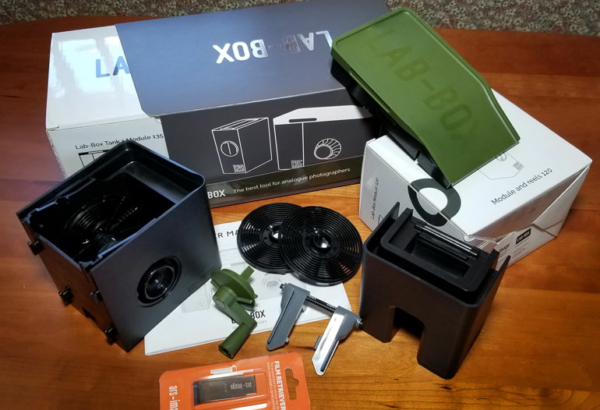
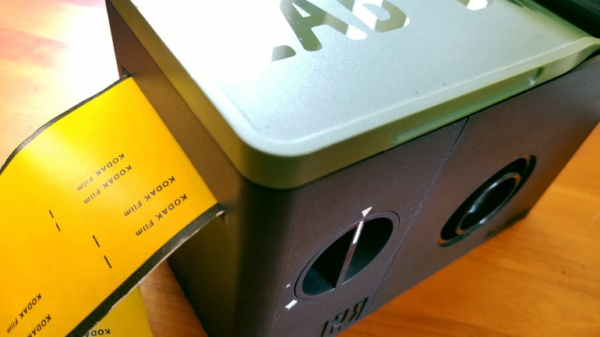
If you are not familiar with Lab-Box, it is a daylight loading tank that doesn’t require a darkroom or changing bag to load your film on the reel. One of the biggest advantages over the former tanks is Lab-Box features a module system that allows you to use it for 35mm or 120 films (the older units required you to buy a separate tank for each size). Lab-Box’s universal tank takes clip-on modules, buy one or both and you are ready to go!
My first recommendation is to read the instructions and/or view videos for assembly and use. Pay especially close attention to the reels when assembling them.
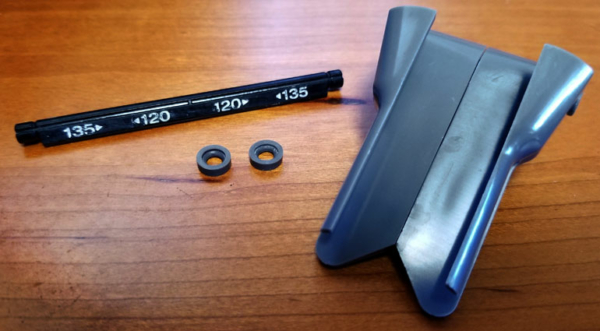
Because the tank accommodates both sizes of film, some parts, like the film guide, need to be adjusted. I feel this is a two-edged sword – it’s great that it doesn’t require two separate units, but I feel it has some minor draw backs because it is not a fixed piece. The film guide (it’s like a ramp the film goes down that guides it onto the reels), comes in three parts and two rubber wheels. The right and left sides slip on a little rail that has 35mm and 120 marks, so you know where to place them. There are little stops to help get them in exactly the correct position. Properly assembled it does its job to perfection, my fear is the rail seems a bit flimsy and I am afraid I will break it, as one of my rails is very hard to adjust. I also find the indicator marks are a little hard to see. You will note I have filled mine in with white acrylic paint for photographic purposes but then realized how much I love it for use as well, since I can see it easily in limited light.
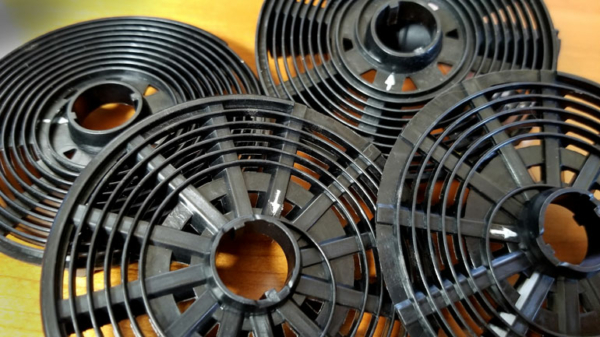
Next you need to attach your module choice, which is very easy, it just clips on. Both units were flawless in attaching and removing. You will next need to attach your reels sides to the hub. This is another area where painting in the guide marks, the “R” and “L” on reels sides and the hub made it visually easier to accomplish. It is very important to assemble these on their proper sides and exactly where indicated on the hub. The 120 is especially important to get correct. The instruction manual is very clear with images and description on doing this. One brilliant thing to note is these reels can be loaded WET! Yes, you can – I have done it, no problems! If you’ve ever tried to load a damp plastic reel you will appreciate this.
In proper sequence place the reel in the tank, attach the side crank or knob, lock it in, and put the film rail in. Now it’s time to load your film. I fully recommend practicing this a few times in the light with scrap film and with the lid off so that you can work out any loading problems before the good film goes in.
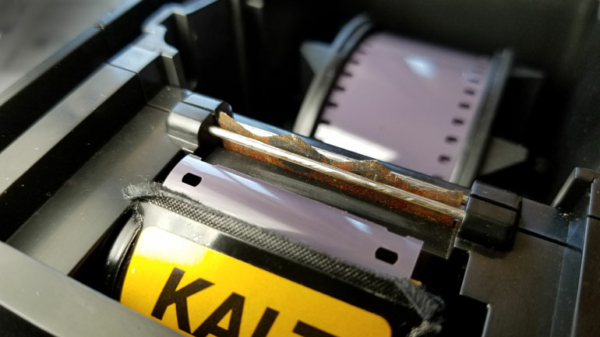
35mm requires you to cut off the tail before loading. If you completely wound it in the cassette Ars-Imago supplies a leader retriever in the box. Use it to pull out the leader and cut it across – but not through – the sprocket holes. I also nick the corners off as I do when loading any reel. Put the cassette in the module, slide out enough film to go under the rollers and attach the clipped strap. Make sure the clip is centered as it is heading down the film guide ramp. Put the lid on and advance the crank/knob slowly to advance the film on the reel. When is stops, cut the film with the built-in cutter and advance it a few more times and the film will be fully loaded on the reel.
120 seems a little scary, but once you practice a few times you will calm down your film sweats. The assembly is the same, put the reel together, place it in the tank, attach the crank/knob and put the adjusted film guide in. Practicing a few times and remembering to open and close the film chamber at the correct times will also ensure loading is easy and perfect. I could go into the exact loading procedure, but the manual and video are excellent for this. Now here’s the scary part: it’s a little un-nerving to see a bit of your film exposed, but this is just the end of the roll where you attach the clip, like the leader of 35mm. Note again I usually clip the little corners off before clipping the strap. With the clip centered on the film, head it down the film guide, close the lid and roll it on slow and even. Like the 35mm, the 120 reel can be wet loaded but the supply area and light tight chamber must be dry. I’ll explain later how and why these areas may get wet.
The final decision you need to make is which method you will use to agitate your film. You can use the 300ml partial filled tank method and agitate by constantly spinning the film. You can also use the 490ml method in which the entire reel is covered with chemistry, and you can agitate in the more traditional method of a few second of every minute. Under the “Tips” section I have a modified method that works perfectly for me.
I love washing in this tank, you can either remove the reel and wash as usual elsewhere or leave the reel in the tank and fill with running water and agitate. I pull the crank/knob out and use running water, and hand spin the reel a few times. Clean water goes in the top and the bad runs out the bottom. It is recommended to remove the modules before washing. More on that later. Once done I give the tank and reel another rinse in clean water and air dry.
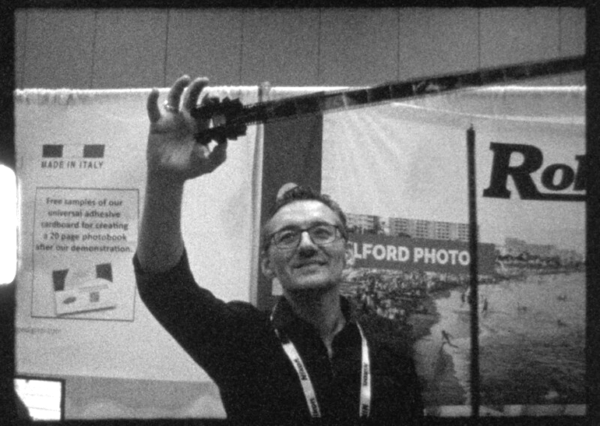
above: Alessandro Franchini of ars-imago proudly demonstrating the LAB BOX at the PDN Photo Plus Expo 2019 in New York City. Michael Raso interviews Alessandro on Film Photography Podcast 235.
When the rules don’t apply:
Ars-Imago (creators of the Lab-Box) warns against using P.E.T. (Polyester) based films – you know, those super-thin, super-strong films like some offered from JCH, Rollei, CatLabs, Bergger, Fomapan and my favorite Svema. However, my first test was on Svema film and although indeed, the cutter will not cut through it, you can cut the film from the cassette in total darkness. Make sure the clap bites into the film. Once hand-cut and attached everything else works fine.
Tips, not in any particular order of importance:
While practicing the first few times with your test film, remove the reel and view it from the side for overlapping or touching film. Loading too fast is usually the culprit, and it’s easy to miss this since the reel may have seemed to load with ease.
Modified fill and agitation method. Many recommend an adjusted developing time if film is constantly agitated during development. Who wants to deal with that. I like the Ron Popeil method, check and use the recommended time on Massive Developing Chart, set it and forget it. I fill the tank with 490ml of chemistry and very gently, but constantly agitate my film. If I need to stop for a second or two I do not have to worry about uneven development. This is a mix of the 2 methods.
If you want to keep your 120 backing paper (as opposed to using the instructed tear-off method), simply pull the tape from the paper and fold it over the film end. Snap the clip right through it – it’s done in the light, so it is easy!
Be sure not to mix 120 and 35mm sides when assembling on the hub (voice of experience). Also make sure the right and left sides are not reversed (again voice of experience)!
The 120 reel must line up properly before loading, if it’s a little off your film can jump the track and over-lap leaving sections undeveloped.
When processing a second roll of 120 make sure and dry all the moisture out of the film holding chamber. The reel can on be rolled onto a wet reel, but a wet film chamber can cause film to bind to itself if damp
And lastly, even a correctly assembled 120 reel can be placed in the tank with the left and right sides flipped. It will slide right in the tank and, yes, although the clip will be upside down you can still attach it to the film. If this happens, the reel will not engage with the crank/knob and not agitate causing uneven and under-developed negatives.
For Leslie’s reviews of other Daylight Tanks, flash back to episode 148 of the Film Photography Podcast or check out the FPP blog “The Daylight Tank that is Really a Daylight Tank,” both cover the Agfa Rondinax daylight processing tanks claiming not to require a darkroom or changing bag to process your film.
Leslie Lazenby fell in love with photography when she was given her first camera, a GAF 126, at the age of 10. Her first job in a camera shop with a custom and commercial photo lab turned into a 20-year adventure in film; leading to positions in darkrooms, customer relations, and as head of purchasing. For the past 15 years, Leslie has owned her own business, Imagine That, retailing traditional photography products, photographic restoration, custom printing and video conversions. She finds her Zen next door at her studio, the Mecca, where she plays with her film cameras, processes film and holds small classes focusing on teens and young adults. @leslie_lazenby on Instagram / https://www.flickr.com/photos/65448995@N05 on Flickr